Friday, August 30, 2013

Namaste Foods - Product Review and #GIVEAWAY

*Disclosure: I was provided with several products to try in exchange for a review.  All opinions expressed here are entirely my own and may differ from others'.

Finding really good gluten-free products can be difficult.  Recently, a friend suggested I try Namaste Foods products.  In fact, Namaste products are not only gluten-free, but wheat, corn, soy, potato, dairy, casein, tree nut and peanut free!  That's a pretty tall order! I contacted the company and they graciously sent me several products to try.

The first product I tried was the Perfect Flour Blend.
I made something I've been missing for 6 months.  My grandmother's crepes!  (If you don't know what they are, they are basically French pancakes!)

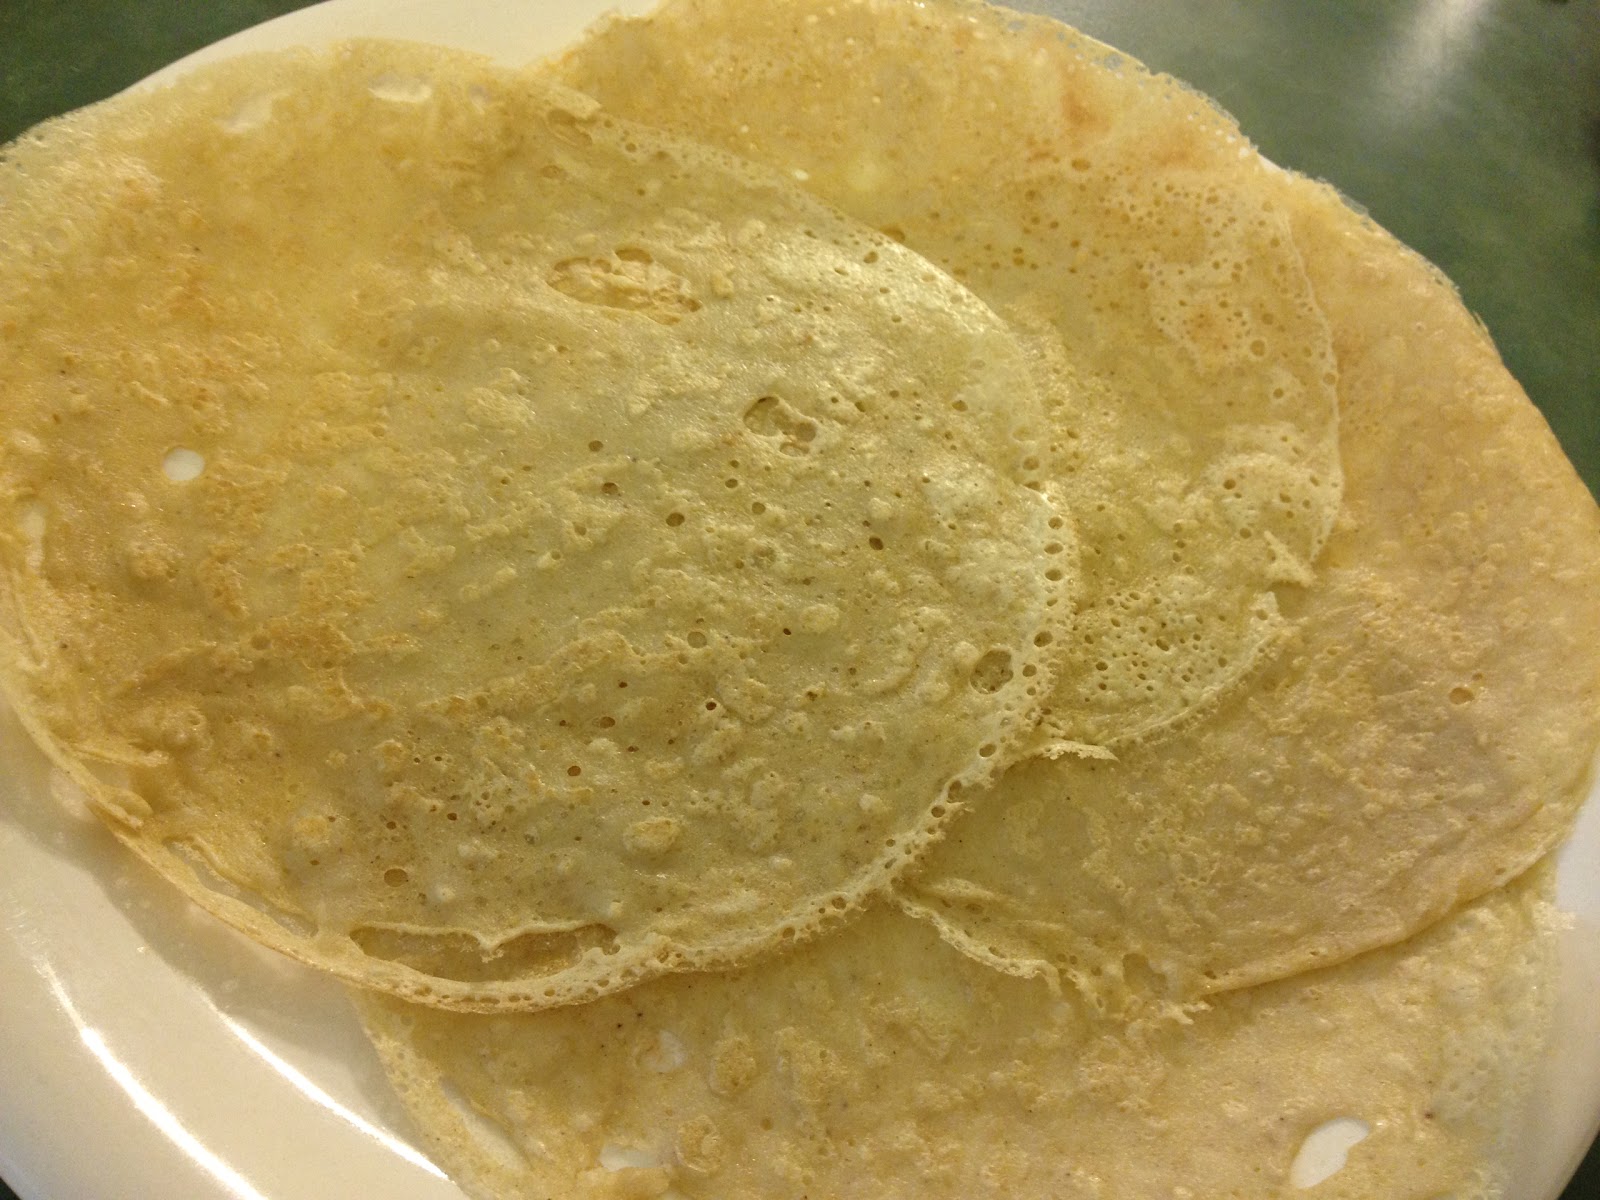
They turned out to be delicious!  They were definitely not exactly like the gluten-filled ones I used to make, but they are absolutely wonderful!  I found I needed a lot more liquid with the Namaste Perfect Flour blend than I did with regular flour.  The only bad thing was, the crepes took forever to cook because they were so moist.  Normally I cook them for about 20 seconds on one side and 10 on the other.  These needed almost a minute on one side and 30-45 seconds on the other side.  That being said, I would make them again and again with the Namaste Perfect Flour blend because they were that good!


Namaste Crepes

Servings: 4

Ingredients:
1 cup Namaste Perfect Flour Blend
3 Tbsp. sugar
1/4 tsp. baking soda
2 eggs
2 1/2 Tbp. vegetableoOil
1/2 tsp. vanilla
1 cup unsweetened almond milk (do NOT use sweetened)
1 1/2 cups water

Directions:
(I made this recipe using my electric crepe maker, so your experience may differ from mine!) 
Mix all of the dry ingredients.
 Mix in the eggs and the rest of the liquids.
Your batter should be the consistency of cream
 I pour my batter into a pie pan and dip my heated crepe maker into it.  I let the batter cook for about 1 minute on one side.
Then, I flip it over and let it cook on the other side for 30-45 more seconds.

Most people don't have an electric crepe maker or a crepe pan so to speak, so you can use a non-stick skillet.  Spray your pan with non-stick spray.  Pour a small amount of batter into your low heat pan and tip your skillet to spread it all around.  Cook on one side until you see lots of bubbles on top (about one minute.) Flip and cook on the other side for about 30-45 more seconds.

I also tried the Namaste Biscuits, Piecrust & More.  It's just as delightful!
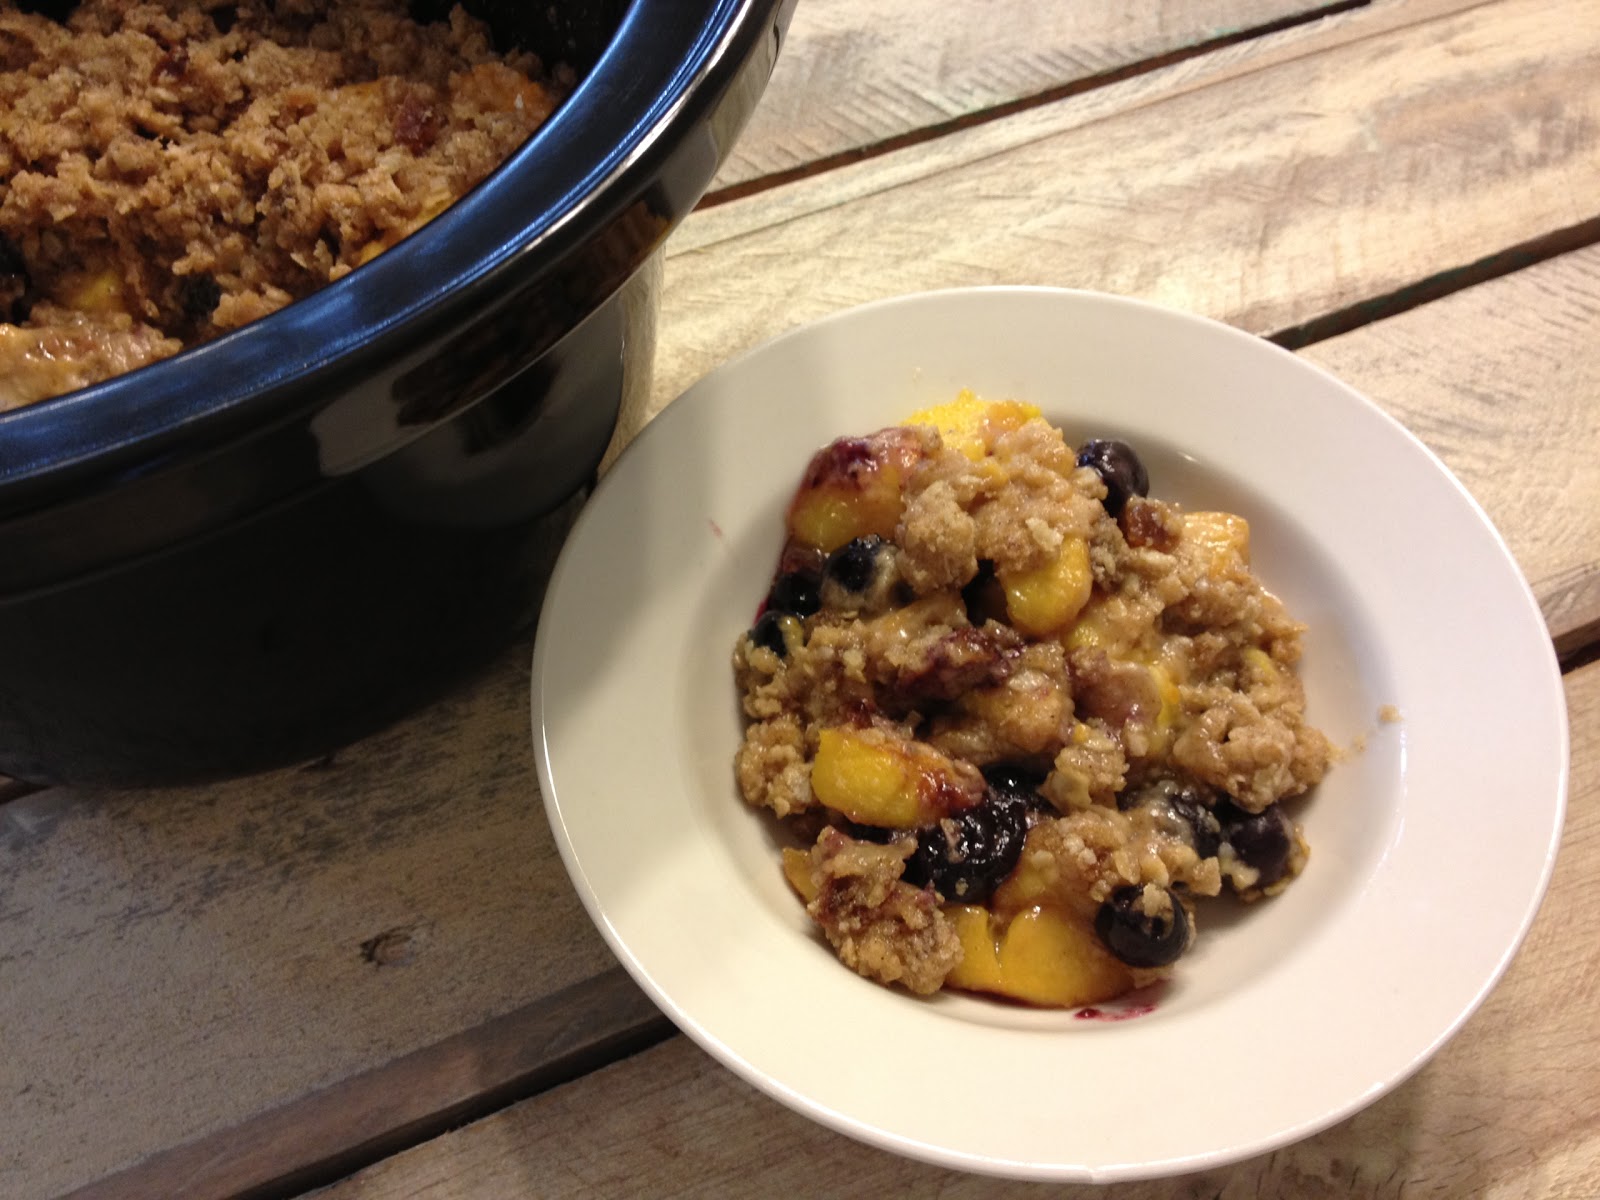
This time I decided to make a Blueberry Peach Crumble.  In my slow cooker of course!
This is probably the most delicious dessert I have made to date.  The crumble turned out just the way I like it and the combination of the peaches and blueberries was divine.  The Biscuits, Piecrust & More did exactly what I wanted it to do in this recipe.  I'm kind of anxious to make biscuits and piecrust with it now too.....but that would have made for a boring review.  So, here is what I made instead...


Blueberry Peach Crumble

Servings: 4

Ingredients:
Filling:
4 peaches, peeled and sliced
1 cup blueberries
1 Tbsp. orange zest
1 Tbsp. orange juice
1/2 tsp. vanilla 
3 Tbsp. sugar in the raw
2 Tbsp. Namaste Perfect Flour Blend

Crumble:
1/3 cup Namaste Biscuits, Piecrust & More
1/3 cup quick cooking oats
1/4 cup sugar in the raw
1/4 tsp. Kosher salt
1/2 tsp. cinnamon
2 pitted dates, diced
4 Tbsp. cold butter, sliced

Directions: (Use a 1 or 2 quart Slow Cooker for this recipe)
Spray your crock with non-stick spray.
Place the blueberries and peaches in the bottom.
Add in the orange zest, orange juice, vanilla and sugar in the raw.
Add in the Namaste Perfect Flour blend and stir to coat all.


In a bowl, add the Namaste Biscuits, Piecrust & More, quick cooking oats, sugar in the raw, kosher salt,cinnamon and dates. 
Mix together.
Place the butter into the bowl.
Using your fingers, work the butter into your mixture until it is all crumbly.
Place this mixture on top of the filling in your crock.
Cook on LOW for 1.5 hours.
Serve warm as is, or over some vanilla ice cream.
Enjoy!

Lastly, I had the pleasure of reviewing the Namaste Say Cheez.
It was good.  You can add just about anything to it, so we put some sliced chicken sausage on top for a little protein.  The kids weren't crazy about it, but they are used to regular mac n' cheese.  I tried it and thought it was delicious!  It does not taste like mac n' cheese at all in my opinion, but I thought it was incredibly flavorful and delightful!

I would recommend Namaste Foods products if you are living a gluten-free lifestyle like me.  I will always have the Perfect Flour Blend and Biscuits, Piecrust & More in my pantry from now on.  They are wonderful baking staples.

You can find out where to buy these products or how to request your store local store manager carry these products by visiting Namaste's website.  Personally, I have found them at Home Goods and my local Meijer!  I've heard several Costco's are carrying them too!
You can find them on at www.namastefoods.com or
and 
Twitter

Ready for the GREAT NEWS?!  You can win a Namaste prize package like this!!!
Winner will receive 3 Namaste Food products, Namaste grocery tote, a copy of their Simple Pleasures cookbook, a copy of Living Without magazine and assorted recipe cards.
Enter through the giveaway tool below.
Print Friendly and PDF

Tuesday, August 27, 2013

FoodSaver Review

*Disclosure: I was sent compensated with a FoodSaver in exchange for this post.  All opinions expressed here are entirely my own.

When I was at BlogHer, I stopped by the FoodSaver booth in the Expo Hall.  I have been wanting to see one of these in action for YEARS!  I was so impressed by all of the features FoodSaver has to offer and how useful it would be in my home!  (I go through a LOT of food here being a foodie blogger!  LOL)

When FoodSaver learned of my excitement, they were happy to send me a brand spankin' new V4800 FoodSaver machine! Isn't it pretty?!!!  
This machine retails for approximately $150.00 and comes with lots with all of these goodies.
The round attachment pictured above is to seal cans and jars and the smaller one on the right is to seal wine bottles.
Because it comes with all of these different bags, it's not hard to get started using this machine right away.
The FoodSaver comes with an easy guide to getting started and there are directions for making your own bags printed right inside the top cover,so you can't possibly forget!  I love this feature!


I first experimented with making my own bag.  Adventurous, I know! LOL
All you do is use the sliding bar under the lid to cut the bag to the size you need (size of your item, plus 5")


You then hit the "seal" button on your FoodSaver and stick one side into the proper place on the machine.
It seals it within a few second , then you have a bag!

I was marinating some Mozzarella Balls, so I place the Mozzarella Balls inside the bag, poured the marinade over the cheese, then swished it around.  I then used the "pulse" feature on the machine to seal the package slowly and not too tightly since I was marinating. They were incredibly delicious!

I also marinated some steak for kabobs the same way. except I used one of the FoodSaver Liquid Block Bags!  They were delicious as well, by the way!

I had some more fun with my FoodSaver! I made my own bags and sealed half a red onion and the rest of the sirloin steak I bought for the kabobs.
I used the FoodSaver Perforated bag for this Chicken Sausage.
 And I sealed a leftover cooked hotdog in a FoodSaver FreshSaver Zipper bag.  These bags have a round circle in the top right corner.  You use the FoodSaver Zipper Bag Adapter (which is sold separately), which attaches to the retractable handheld sealer, to suck the air out of these bags and they have a zip lock on top.


I should mention that the FoodSaver bags are all reusable.  However, bags containing greasy, oily foods, or raw meats, fish, eggs or un-pasteurized cheese CANNOT be reused.  They can even go in the dishwasher!  Pretty nifty! (And Green!)

There are lots of FoodSaver Accessories you can purchase to make the most of your machine.  I plan to buy the FoodSaver Quick Marinator.  With the help of the machine, it marinates your food in 12 minutes!  That's it!!!!  No more waiting over night!  Pretty impressive, right?!

I cannot wait to buy all my meats in bulk and seal them with the FoodSaver before freezing them!  I'm going to save SOOOOOOOOOO much money!  No more freezer burn!!!  Yay!!

To find out more about the FoodSaver,  visit www.foodsaver.com or find them on 


Print Friendly and PDF

Simple Mexican Shredded Chicken - Gluten-Free

This was another one of those "what do I have around here I can throw in the slow cooker?" meals!  LOL  Seriously.  Some of the best meals I make come from this process!

This chicken was not only delicious, but SUPER easy to make!  This should definitely make your meal plan on a week where you're going to be really busy and don't have time to fuss with anything.  You can eat this chicken as is with some nice healthy sides (beans, rice, steamed veggies) or you can shred it and serve it in tacos, on nachos, in a gluten-free wrap like I did, or in quesadillas!  Endless possibilities really!

This chicken is extremely versatile, which means it would be great to make a large quantity of it and freeze the leftovers for days you're too busy to even get something in the slow cooker.

I love my slow cooker.  Have I mentioned this before?!  It makes my "cooking" life a snap!  Now, go dig out these ingredients and make this for tomorrow! (or today!)


Servings: 4-8

Ingredients:
3 lb. boneless skinless chicken
1 can (15.5 oz.) pinto beans, drained
16 oz. salsa (whatever kind you like)
1 Tbsp. lime juice
2 tsp. chili powder

Directions: Use a 3 Quart Slow Cooker for this recipe.
Place your chicken into the bottom of your slow cooker.
Pour the pinto beans over the top.
Mix together the salsa, lime juice and chili powder, then pour over the top.
Cook on LOW for 5 hours, or on HIGH for 2 hours.
Shred the chicken and then mix back in the juices or serve to your liking!
Enjoy!
Print Friendly and PDF

Sunday, August 25, 2013

Gluten-Free Awareness Tour Comes to Metro Detroit - I'll be presenting AND...I have TICKETS TO #GIVEAWAY!


Great news!  The Gluten-Free Awareness Tour is coming to Metro Detroit September 7 & 8, 2013 from 9 am-3 pm.  It will all take place at the Double Tree Hotel at 5801 Southfield Expressway, Detroit, Michigan.


There will be tons of gluten-free samples to taste, nutrition and Celiac Disease experts to chat with....AND I will be giving a chef demonstration on September 7 as well!  I'm so excited I can hardly stand it!  I feel so honored I was asked and I promise not to let you down!

The ‘Tour’s’ Detroit stop is presented by Kroger’s and sponsored by Enjoy Life, Massel USA, Nature’s Path and Rudi’s Gluten-Free Bakery.  Admission is $10 for adults and children under 12 are admitted free.

Print this off and bring it with you for $2 off your tickets!!!!

The Celiac Awareness Tour in not just in Detroit!  There are stops in 
San Francisco 9/21
Cincinnati 10/12
Chicago 10/26
Cleveland 11/16

And guess what?!  I get to GIVE AWAY TICKETS!!  Whoo hoo!!! Enter through the Giveaway Tool below.  
*These tickets are for the Detroit, MI stop ONLY!
*Disclosure: I have have received 2 tickets to the Celiac Awareness Tour as compensation for this post.  All opinions expressed here are entirely my own.
Print Friendly and PDF

Friday, August 23, 2013

FitAddict Training...Join Me and Become A Busy Mom's Slow Cooker Adventures FitAddict Trainee!


Those of you who follow me on Facebook and Twitter know I talk about FitAddict Training daily!  I'm on a quest to be totally FIT and I've been training with FitAddict Training.  I'm nearing the end of my 3rd week of training with them and I'm loving it!

Here's the best part about FitAddict Training....you don't have to live anywhere near me to train!  Pretty cool, right?!  So, you're probably now wondering....how the heck does that work?!  I train online. :)

Here's how it works:


  • All you need is a Laptop, Computer, iPad or AppleTV.  
  • You will probably want a yoga or exercise mat of some sort.
  • You will need a couple free weights.  I have 2-3lb. weights, but I need to get some heavier ones too.  I plan to hit up local thrift stores to find more!

Andrea is on the left and that's me on the right.

I've currently joined a 6 week boot camp, but you can email them for different options and even personal training. You will be given a suggested meal plan to follow.  All jokes are free ;)

All workouts are live in EST.  Workouts are currently M-W-F 5:30 a.m., T-Th 6:00 p.m. and Saturday at 9:30 a.m.

All workouts are recorded, then posted later that day in case you miss class.  This means, if you aren't able to get up at 5:30 a.m. (or are in another time zone) you can still do the workout for the day.

You will be held accountable.  I NEED this!!!!  This is the only thing that keeps me going!  If you don't show up for class, Andrea or Julie will message or call you.  This is wonderful!  I took all my measurements the other day, weighed myself (but I don't own a scale, so my neighbor weighed me, I didn't look and she emailed the number to my trainer.) I don't want to focus on my weight, but I do want to know that the numbers are changing.  For me, it's about feeling amazing about myself when I look in the mirror and feeling sexy and confident in my clothes.

I did my homework for week one.  It's pictured below.

When this 6 weeks is up, I will post my Before and After picture for you to see (and that's being MIGHTY brave of me, TRUST ME!!!!!)

I have had a GREAT experience with FitAddict Training so far and I hope that some of you will join me!  I've even started a Facebook Group for the A Busy Mom's Slow Cooker Adventures FitAddict Trainees!  I hope to see you there!

You can sign up for a 7 day trial through their FitAddict LiveStream Trial page on Facebook.

Oh!!!  If you sign up by tomorrow, August 24, 2013, you can get 4 weeks of  FitAddict Boot Camp for $149.99!

Here are all the ways you can find them!
Website coming soon (approximately September 1!)
Facebook-
FitAddictTraining
FitAddict Training LiveStream Trial
Email FitAddictBootCamp@gmail.com

So, what are you waiting for?!  Are you ready to get FIT with me!!!!!  Let's get ADDICTED and be FitTastically in shape!!!


Print Friendly and PDF

Simply Marinated Chicken Tenders - Gluten-Free

Boneless skinless chicken tenders are often on sale at my local grocery store.  Whenever I buy them, I end up cooking them on the stove top for some reason.  With my "healthier" way of thinking right now, I really wanted to infuse them with some wonderful flavor so I could use them in a variety of ways.  They turned out wonderfully! 

There are several things I love about this recipe:
#1 - It's SIMPLE
#2 - All the ingredients will most likely already be in your pantry.
#3 - It's versatile!

You can make these ahead, use them within a few days in several recipes (I made a Chicken Pasta Salad and my husband made some Chicken Spaghetti), freeze them, or just eat them as they are!  It doesn't get more versatile than that!


Servings: 4-8 depending on what you do with them.

Ingredients:
1.75-2 lbs. boneless skinless chicken tenders
2 Tbsp. apple cider vinegar
2 Tbsp. garlic powder
1 tsp. onion powder
1 tsp. Mrs. Dash original
1 tsp. lemon pepper seasoning
1/8 tsp. red pepper flakes
1 bay leaf
1 cup or so of water

Directions: Use a 2-3 Quart Slow Cooker for this recipe.
In the bottom of the crock, pour in the apple cider vinegar, garlic powder, onion powder, Mrs. Dash, lemon pepper seasoning, and red pepper flakes.
Add about a cup of water and stir. (You can always add more water later.)
Add your chicken and the bay leaf.
If you're doing more than 2 lbs. of tenders, you just want sure you add enough water to cover the chicken.
Cook on LOW for 4-5 hours, or on HIGH 2-2.5 hours.
Enjoy!
Print Friendly and PDF